Make theory fun
I love board games and I have a growing collection. I purchased a board game called 'Dixit' but never ended up playing it. Instead, I took out all the beautiful graphics cards from the box and used it to develop my own Art theory lessons. These cards are drawn with dreamlike features. The following ideas can be adapted with real artworks. I prefer using Dixit cards with my junior classes as it is easier for them to hold and it is visually appealing to them.
Above: Some of the cards from the Dixit box.
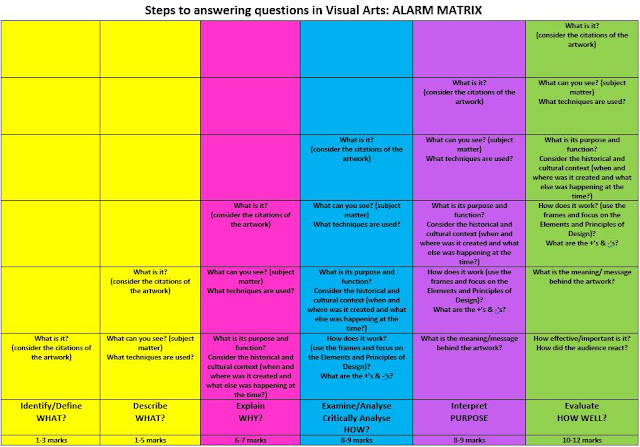
A few days ago, I made an interactive lesson where students had the opportunity to work in pairs. Every pair was given a 'secret card' with one unknown artwork. They had to break down large butcher papers into four key areas and include the headings: describe, analyse, interpret and judgement. Students were then asked to use these headings to talk about the unseen artwork. Obviously, the teacher needs to explain what to do under each section. I gave the instructions in both verbal and written form. Once completed, all the cards were taken back and shuffled. It was then handed back out to random pairs. Students had to walk around the room to find the butcher paper/poster that best matches their given card. This means the information on the butcher paper had to be informative.
When students found the correct poster, they were asked to correct the information, thus taking on the role as mini teachers. They were encouraged to add in any extra information that may have been missed by the first pair. This extra stepped allowed students to see how answers could be improved. Students were also asked to include their own interpretations. Groups had to share their findings to the whole class. This allowed students to reflect on what they had written down on the poster.
One of the pairs was given a card with a scarecrow standing amongst a field of sunflowers. The first pair to write about the work using the four key areas failed to mention that it was a scarecrow. They described the work as a man in a field of flowers. The second group who came along was able to identify that it was indeed a scarecrow standing in a field of sunflowers. This improved the response as more accurate information was given.
Above: Instructions left on the whiteboard. It was also verbally explained.
Above: Students working hard with their partner.
Above; Students were really engaged.
Above: Dialogues were made between the pairs and they were able to formulate answers together.
Above: Students were encouraged to sit further away from other pairs so that their card remains a secret.
Above: Once the cards have been collected, they are shuffled together. Each pair is then assigned to a new card. They had to walk around the room and find the poster that matches up with their card. They were encouraged to sit down and read the information. Any missed information was added onto the poster.
Another game that I like to play with students is called 'Blind Painter'. I get students to work in pairs. One student gets the card and needs to describe what he/she can see. The other student needs to draw down the artwork based on the descriptions. The person drawing is NOT allowed to look at the card. The purpose of the lesson is to build onto their describing skills and become more familiarised with the Elements and Principles of Design. They are forced to talk about shape, lines, texture, space, patterns etc.
Students get to swap over so everyone gets a go. In one lesson timeframe, students can swap over several times. I am always impressed with the process and the end results. If time permits, I ask the pairs to come up with an 'interpretation' of the artwork.
Students get to swap over so everyone gets a go. In one lesson timeframe, students can swap over several times. I am always impressed with the process and the end results. If time permits, I ask the pairs to come up with an 'interpretation' of the artwork.


Comments
Post a Comment